
2015 Husqvarna TE 250 – 300 Service Repair Manual
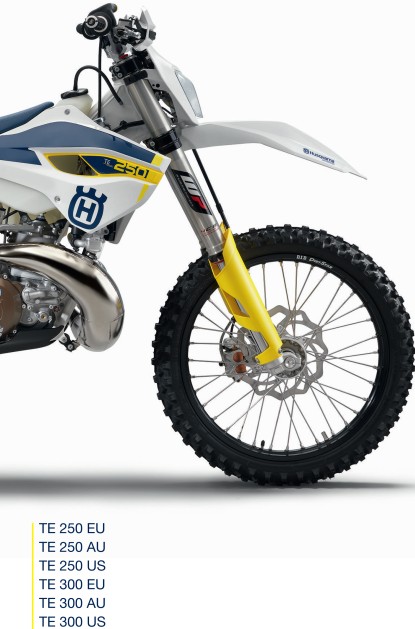
2015 Husqvarna TE 250 – 300 Service Repair Manual
Table of Contents
1. Means of Representation
1.1 Symbols Used
1.2 Formats Used
2. Safety Advice
2.1 Repair Manual
2.2 Safety Advice
2.3 Degrees of Risk and Symbols
2.4 Work Rules
3. Important Notes
3.1 Warranty
3.2 Operating and Auxiliary Substances
3.3 Spare Parts and Accessories
3.4 Figures
4. Serial Numbers
4.1 Chassis Number
4.2 Type Label (TE EU/AU)
4.3 Engine Number
4.4 Fork Article Number
4.5 Shock Absorber Article Number
5. Motorcycle
5.1 Raising the Motorcycle with the Lift Stand
5.2 Removing the Motorcycle from the Lift Stand
5.3 Starting
5.4 Starting the Motorcycle for Checking
6. Fork and Triple Clamp
6.1 Adjusting the Compression Damping of the Fork
6.2 Adjusting the Rebound Damping of the Fork
6.3 Bleeding the Fork Legs
6.4 Cleaning the Dust Boots of the Fork Legs
6.5 Loosening the Fork Protection
6.6 Positioning the Fork Protection
6.7 Removing the Fork Legs
6.8 Installing the Fork Legs
6.9 Removing the Fork Protector
6.10 Installing the Fork Protector
6.11 Performing a Fork Service
6.12 Disassembling the Fork Legs
6.13 Removing the Spring
6.14 Disassembling the Cartridge
6.15 Disassembling the Piston Rod
6.16 Disassembling the Hydrostop Unit
6.17 Disassembling the Seal Ring Retainer
6.18 Checking the Fork Legs
6.19 Assembling the Seal Ring Retainer
6.20 Assembling the Hydrostop Unit
6.21 Assembling the Piston Rod
6.22 Assembling the Cartridge
6.23 Assembling the Fork Legs
6.24 Greasing the Steering Head Bearing
6.25 Removing the Lower Triple Clamp
6.26 Installing the Lower Triple Clamp
6.27 Checking the Play of the Steering Head Bearing
6.28 Changing the Steering Head Bearing
6.29 Adjusting the Play of the Steering Head Bearing
7. Handlebar and Controls
7.1 Handlebar Position
7.2 Adjusting the Handlebar Position
7.3 Adjusting the Basic Position of the Clutch Lever
7.4 Checking Throttle Cable Routing
7.5 Checking the Play in the Throttle Cable
7.6 Adjusting the Play in the Throttle Cable
8. Frame
8.1 Removing the Engine Guard
8.2 Installing the Engine Guard
8.3 Checking the Frame
9. Shock Absorber and Swingarm
9.1 Adjusting the High-Speed Compression Damping
9.2 Adjusting the Low-Speed Compression Damping
9.3 Adjusting the Rebound Damping
9.4 Measuring the Sag of the Unloaded Rear Wheel
9.5 Checking the Static Sag of the Shock Absorber
9.6 Checking the Riding Sag of the Shock Absorber
9.7 Adjusting the Spring Preload of the Shock Absorber
9.8 Adjusting the Riding Sag
9.9 Removing the Shock Absorber
9.10 Installing the Shock Absorber
9.11 Checking the Shock Absorber Linkage
9.12 Servicing the Shock Absorber
9.13 Removing the Spring
9.14 Disassembling the Damper
9.15 Disassembling the Piston Rod
9.16 Disassembling the Seal Ring Retainer
9.17 Changing the Pilot Bushing
9.18 Checking the Damper
9.19 Removing the Heim Joint
9.20 Installing the Heim Joint
9.21 Assembling the Seal Ring Retainer
9.22 Assembling the Piston Rod
9.23 Assembling the Damper
9.24 Bleeding and Filling the Damper
9.25 Filling the Damper with Nitrogen
9.26 Installing the Spring
9.27 Checking the Swingarm
9.28 Removing the Swingarm
9.29 Installing the Swingarm
9.30 Changing the Swingarm Bearing
10. Exhaust
10.1 Removing the Main Silencer
10.2 Installing the Main Silencer
10.3 Changing the Glass Fiber Yarn Filling in the Main Silencer
11. Air Filter
11.1 Removing the Air Filter Box Cover
11.2 Installing the Air Filter Box Cover
11.3 Removing the Air Filter
11.4 Installing the Air Filter
11.5 Cleaning the Air Filter and Air Filter Box
11.6 Sealing the Air Filter Box
[wp_eStore_buy_now_fancy id=2265]
[wp_eStore_cart_fancy1_when_not_empty]